
The Unsung Hero: Uncovering the True Purpose of Roof Underlayment
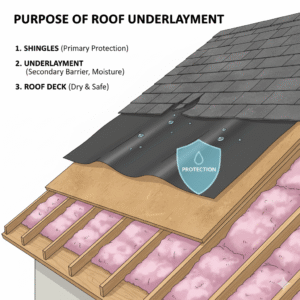
For most U.S. homeowners, the “roof” is just the shingles they see from the street. It’s the color, the architectural style, the curb appeal. But what you *don’t* see—the hidden layer of protection tucked just beneath those shingles—is arguably one of the most critical components for keeping your home safe and dry. This component is the **roof underlayment**. Think of it this way: if your shingles are the armor, the underlayment is the chainmail underneath. The armor deflects the main attack, but the chainmail stops the arrows that sneak through the gaps. It’s the hidden, hardworking hero of your entire roofing system, and skimping on it is one of the costliest mistakes a homeowner can make.
Here at Roof Insider, we’ve seen the devastating consequences of failed or improperly installed underlayment: rotted roof decks, saturated attic insulation, rampant mold growth, and ceiling stains that signal thousands of dollars in repairs. A catastrophic failure can easily accelerate the need for a full-scale roof replacement on a 3,000 sq ft house, a cost that can run into tens of thousands of dollars. Worse, many insurance policies can deny claims for water damage if it’s found that the roof wasn’t installed to code—and code *demands* underlayment. If you’re wondering what happens if you don’t use your insurance money to fix your roof, this is one of those scenarios where the insurance company may have grounds to deny the claim, leaving you with the full bill.
In this comprehensive guide, we’re going to peel back the layers and expose the vital purpose of roof underlayment. We’ll explore the different types (from old-school tar paper to high-tech synthetics), explain *why* it’s your home’s last line of defense, and discuss the critical differences in how it’s used for asphalt, metal, and tile. By the time you’re done, you’ll not only be able to answer “what is the purpose of roof underlayment?” but you’ll understand why it’s a non-negotiable part of a secure, long-lasting roof.
What’s In This Guide
- The 5 Core Purposes of Roof Underlayment
- The 3 Main Types of Underlayment (And What to Use)
- Asphalt-Saturated Felt (Tar Paper)
- Synthetic Underlayment
- Self-Adhered (Ice & Water Shield)
- Amazon Product Spotlight: Our Picks for a Secure Roof
- How Underlayment is Installed: A Guide for Pros & DIYers
- Special Considerations for Metal & Tile Roofs
- DIY vs. Hiring a Pro: The Underlayment Decision
- Frequently Asked Questions (FAQ) About Roof Underlayment
The 5 Core Purposes of Roof Underlayment
Underlayment isn’t just a single-purpose product. It’s a multifunctional shield that serves five distinct, critical roles in protecting your home. Understanding these functions is key to appreciating its value.
1. The Secondary Water Barrier (Its #1 Job)
Your shingles are the *primary* water-shedding surface, but they are not 100% waterproof. They are designed to work like the scales of a fish, overlapping to deflect water down the roof. However, water is a relentless enemy and can get past this first line of defense in several ways:
- Wind-Driven Rain: In a severe U.S. storm, 60+ mph winds can lift the edge of a shingle and drive rain *uphill*, forcing it underneath the shingle and past the nail line. This is a major concern in hurricane zones, where even flat roofs have specific wind-uplift requirements.
- Ice Damming: In cold climates, heat escaping from your attic melts snow on the roof. This water runs down and refreezes at the cold eaves, creating a “dam” of ice. Water pools behind this dam, submerging the shingles and seeping underneath, directly onto the underlayment.
- Damaged/Missing Shingles: If a shingle is cracked by a falling branch or blown off in a storm, the underlayment becomes the *only* thing standing between the elements and your roof deck.
In all these cases, a high-quality underlayment is the watertight (or water-resistant) membrane that catches this infiltrating water and directs it safely down to the gutters, preventing it from ever touching the wooden roof deck below.
2. Protects the Roof Deck During Construction
A roof replacement doesn’t happen in an hour. It can take days, or even weeks if the weather turns bad. After the old roof is torn off, the bare wooden decking (usually OSB or plywood) is exposed. If a sudden rain shower pops up, that wood would be saturated, leading to swelling, warping, and a compromised deck.
This is why the first thing a professional crew does after tear-off is to “dry in” the roof by rolling out the underlayment. This is a critical step that requires the right tools, from a sharp utility knife to the best roofing nail gun (or cap nailer) to fasten it. Modern synthetic underlayments are especially good at this; many are UV-stabilized and can be left exposed to the elements for 30, 60, or even 180 days, acting as a temporary roof and giving the crew flexibility to work without panic.
3. Ensures Code Compliance & Manufacturer Warranties
This is a big one. Virtually all U.S. building codes (based on the International Residential Code or IRC) *mandate* the use of an approved roof underlayment. Building a roof without it is not just a bad idea; it’s illegal and will fail inspection, which can halt the sale of your home. Furthermore, every major shingle manufacturer (GAF, CertainTeed, Owens Corning) *requires* the use of underlayment as a condition of their product warranty. If your roof fails and the inspector finds the underlayment was missing or improperly installed, your 30-year warranty will be voided instantly.
4. Provides Critical Ice Dam Protection (Self-Adhered)
As mentioned, ice dams are a destructive force in the northern half of the U.S. Standard underlayment isn’t enough to fight them. This is where a special, sticky-backed underlayment called “Ice & Water Shield” comes in. This self-adhered membrane is installed on the most vulnerable parts of the roof (the eaves, valleys, and around penetrations). Its key feature is that when a nail from a roofing hammer or nail gun penetrates it, the asphalt and rubber in the membrane create a watertight “gasket” seal around the nail. This makes it impossible for the standing water from an ice dam to leak through the fastener holes.
5. Contributes to the Overall Fire Rating
Many homeowners are surprised to learn this. A roof’s “Class A” fire rating (the best you can get) isn’t just from the shingles. It’s a rating for the *entire roofing assembly*. The underlayment plays a specified role in how the system resists fire from an external source (like flying embers). Using an unapproved or missing underlayment can compromise this fire rating, which is a serious safety and insurance concern, especially in wildfire-prone states like California, Colorado, and Florida.
The 3 Main Types of Underlayment (And What to Use)
Not all underlayment is created equal. The technology has evolved dramatically, and what your parents had on their roof is very different from the high-tech materials available today. If you’re looking for a top-level comparison, you can check out our list of the best roof underlayments, but here’s the detailed breakdown of the three main families.
1. Asphalt-Saturated Felt (Tar Paper)
This is the “old school” original. It’s a paper-like material made of organic or fiberglass matting that has been saturated with asphalt (tar) to make it water-resistant. It’s been used for over 50 years and is still a common choice for budget-focused projects. It comes in two standard weights:
- #15 Felt: Lighter, thinner, and less water-resistant. The absolute minimum baseline.
- #30 Felt: Twice as heavy, more durable, and more water-resistant. It’s the standard choice if you’re going to use felt.
(+) Pros
- **Inexpensive:** It’s the cheapest option available.
- **Vapor Permeable:** It “breathes,” allowing moisture from the attic to escape.
- **Proven Track Record:** It’s a known quantity that has worked for decades.
(-) Cons
- **Tears Easily:** It rips easily during installation and can be punctured by walking on it.
- **Heavy:** A roll of #30 felt is a burden to get up roof ladders.
- **Dangerous When Wet:** Becomes incredibly slick and a major fall hazard.
- **Wrinkles:** If it gets wet before shingles are installed, it can “wrinkle,” which may show through the final shingles (“telegraphing”).
- **Low UV Resistance:** Can be destroyed by the sun in a matter of days.
2. Synthetic Underlayment (Non-bitumen)
This is the modern standard and what most professional, quality-conscious roofers use today. Instead of asphalt-soaked paper, synthetic underlayment is an engineered textile made from woven polypropylene or similar plastics, often with a special non-skid coating on top and an anchor-resistant coating on the bottom. It is superior to felt in almost every measurable way.
(+) Pros
- **Incredibly Strong:** It is extremely tear-resistant. You can’t rip it with your hands.
- **Lightweight:** A 10-square roll (1,000 sq ft) can weigh 3-4 times *less* than the equivalent amount of felt.
- **Safer to Install:** Most brands have a high-traction, non-slip walking surface. The best roofing shoes get an excellent grip on it.
- **Excellent Water Resistance:** It doesn’t absorb water like felt and is a much more reliable barrier.
- **High UV Resistance:** Can be left exposed for 3-6 months, making it a perfect “dry in” solution.
(-) Cons
- **Higher Upfront Cost:** It is more expensive than #30 felt (but the value is worth it).
- **Vapor Barrier:** Many are non-permeable, which is not a problem *if* you have good attic ventilation (like roof exhaust fans), but can be an issue in older homes with poor airflow.
3. Self-Adhered (Ice & Water Shield)
This is the specialty bodyguard of the group. It’s a high-tech, peel-and-stick membrane made of modified asphalt and rubber. Its primary purpose is not to cover the whole roof, but to protect the most vulnerable areas. As mentioned, its “magic” is its ability to form a gasket seal around nails, making it the only product that truly waterproofs fastener penetrations. It is required by code in most of the northern U.S. at the eaves, but it’s a best practice to use it in *any* high-risk area, including:
- Around all penetrations: Roof windows, skylights, plumbing vents, and chimneys.
- In all valleys (where water is concentrated).
- Along all rake edges (the sloped sides of the roof).
- Anywhere roof flashing is used, as a secondary barrier.
- On complex roof structures like a roof cricket.
(+) Pros
- **Completely Waterproof:** The gold standard of water protection.
- **Seals Around Fasteners:** This is its superpower.
- **Required for Ice Dams:** The only real solution for ice dam protection.
(-) Cons
- **Expensive:** It is the most expensive type, which is why it’s used strategically.
- **Tricky Installation:** It’s a one-shot deal. Once it sticks, it’s very hard to reposition.
- **True Vapor Barrier:** It seals *everything*, so it must be used appropriately.
Amazon Product Spotlight: Our Picks for a Secure Roof
While you should always consult a local pro, here are the types of products available on Amazon that U.S. homeowners and contractors rely on for a well-protected roof.
Product Spotlight 1: The Modern Standard (Synthetic)
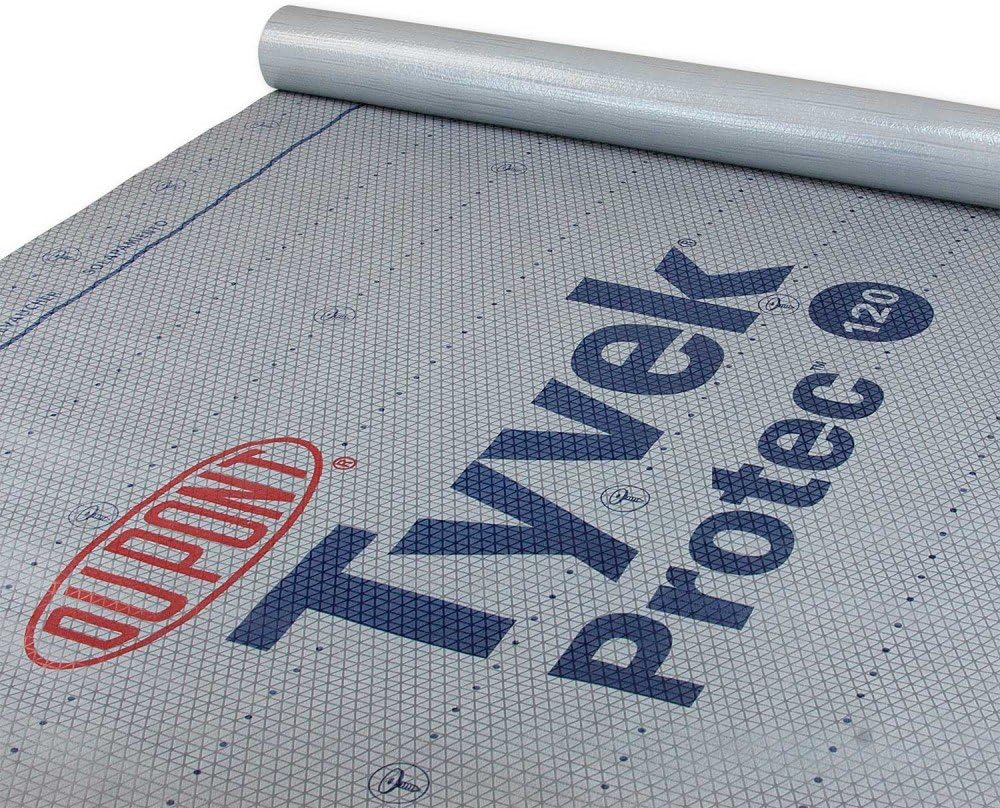
Product Example: DuPont Tyvek Protec 120
This is a perfect example of a high-quality synthetic underlayment. It’s lightweight, incredibly durable, and features a high-traction surface that gives installers confidence and safety. It’s a “breathable” synthetic, meaning it has a perm-rating that allows trapped moisture vapor to escape, making it a great choice for any home. This is the “install it and forget it” peace-of-mind option that provides massive-step-up in protection over old-fashioned felt for a modest increase in cost.
Shop Synthetic UnderlaymentProduct Spotlight 2: The Critical Protector (Ice & Water Shield)

Product Example: Grace Ice & Water Shield HT
Grace is the brand that invented this category, and it’s still the gold standard. This is a high-temperature (HT) version, designed to be stable even under hot shingles or hot Florida metal roofs. You don’t cover your whole roof with this, but you *must* use a product like this on your eaves, in your valleys, and around your skylights. Its self-sealing technology is the difference between a minor leak and a major interior repair. This is a non-negotiable part of any quality roofing job.
Shop Ice & Water ShieldsProduct Spotlight 3: The Traditional Workhorse (Felt)

Product Example: GAF FeltBuster (#30 Felt Equivalent)
Even in the “felt” category, technology has improved. While you can still buy basic #30 felt, many brands now offer a “synthetic felt” or “enhanced felt” like FeltBuster. It’s designed to have the breathability and low cost of felt, but with the non-slip grip, lighter weight, and tear resistance of a synthetic. It’s an excellent compromise if you’re on a tight budget but still want better performance and safety than old-fashioned tar paper.
Shop Roofing FeltsProduct Spotlight 4: The Installation Essential (Cap Nailer)

Product Example: BOSTITCH N66BC-1 Cap Nailer
How you attach the underlayment matters. Do NOT let a contractor use staples. They create small rips, don’t hold well, and will void most warranties. The *only* approved method is to use 1-inch-cap nails. You can hand-bang them with one of the best roofing hammers, but a pro will use a cap nailer like the Bostitch N66BC. It shoots a nail with a large plastic cap, which provides a 1000% better hold and seals the penetration. It’s a sign of a professional roofer.
Shop Cap NailersHow Underlayment is Installed: A Guide for Pros & DIYers
Proper installation is just as important as the product itself. A $10,000 sheet of synthetic underlayment is useless if it’s installed upside down.
- Start at the Bottom: Always work from the bottom of the roof (the eave) and move up, so the upper layers overlap the lower layers. This ensures water runs *over* the seams, not *into* them.
- Ice & Water Shield First: If you’re using it, the self-adhered Ice & Water Shield is installed first at the eaves, typically one or two courses wide (3 to 6 feet up the roof).
- Drip Edge Integration: This is key. At the eaves (the bottom, horizontal edge), the underlayment goes *over* the drip edge. At the rakes (the sloped, side edges), the underlayment goes *under* the drip edge. This is a critical detail that many rookies get wrong.
- Overlap is Everything: Follow the manufacturer’s printed lines. A typical synthetic underlayment requires a 6-inch horizontal overlap (sidelap) and a 3-inch vertical overlap (headlap). In valleys, the underlayment should be overlapped by at least 12 inches.
- Fasten Correctly: Use 1″ cap nails every 12 inches on the seams and in a grid pattern in the field (every 2 feet). This prevents wind from getting under the sheet and turning it into a giant sail.
For complex repairs, like patching a small area, you can’t just slap a new piece on. You must integrate it with the existing layers, potentially using the best roofing tape for a temporary seam or a high-quality roof sealant to waterproof the patch (though sealant should be a last resort, not a primary waterproofing method).
Special Considerations for Metal & Tile Roofs
Not all roofs are asphalt shingles. Metal and tile roofs have very different needs, and using the wrong underlayment can lead to catastrophic failure.
Underlayment for Metal Roofs
A metal roof is a lifetime investment, but its enemy is *condensation*. The underside of a metal panel will “sweat” as it heats and cools. This is why a simple felt paper is a terrible idea. Furthermore, a metal roof gets incredibly hot. A standard asphalt-based underlayment can literally melt and bond to the back of the metal panel. This is a common question we get: do metal roofs make your house hotter? The answer is no, they are highly reflective and part of a “cool roof” system, but the *surface temperature* of the metal itself can exceed 160°F.
For this reason, metal roofs require a **high-temperature synthetic underlayment**. This is a non-negotiable requirement. These are specifically designed to withstand temperatures up to 250°F or more without melting or degrading. They also provide a critical buffer between the metal panels and the roof deck. When thinking about can you paint a metal roof or installing a ridge vent for a metal roof, the integrity of this high-temp underlayment is what ensures the system’s longevity.
Underlayment for Tile Roofs
Clay or concrete tile is a “water-shedding” system, not a “waterproofing” one. Water is *expected* to get under the tiles. For this reason, the underlayment on a tile roof is arguably *more* important than the tiles themselves. A tile roof is so heavy, and the job so complex, that you want the underlayment to last 50+ years.
Because you can’t just walk on a tile roof to check it, the underlayment has to be perfect from day one. Most U.S. codes (especially in Florida and California) require a **dual-layer system** for tile, often consisting of one layer of #30 felt or synthetic, topped with a second layer of a self-adhered “cap sheet.” This creates a truly robust, waterproof system designed to last as long as the tiles.
DIY vs. Hiring a Pro: The Underlayment Decision
Can a homeowner DIY a roof replacement, including the underlayment? Yes. Should you? Probably not. Roofing is consistently one of the most dangerous jobs in America. The risk of a fall is extreme, and a mistake is costly.
A professional crew has the safety systems and experience to do the job safely and quickly. This isn’t just about having one of the best roof harnesses; it’s about knowing *how* to set an anchor, how to manage your lifeline, and how to move on a sloped surface without thinking. A pro’s roofing tool belt is stocked with tools they’ve used thousands of times. Their salary is high because the work is high-risk and high-skill.
When you hire a pro, you’re also paying for their knowledge. They can spot a problem from a mile away. They might start with a drone for the roof inspection to check the chimney and ridges. They’ll know the exact local code for ice shield and fastener patterns. The roof inspection cost is often waived if you hire them for the job. They can spot subtle issues, like a sagging deck that indicates a moisture problem, or signs that roof rats have been chewing on vent boots, long before a homeowner would.
A DIY mistake can lead to a situation where you have to call a pro to fix the mess, *and* you may have to deal with your insurance company. If you’re wondering what happens if you don’t use your insurance money to fix your roof, the answer is you’ll be on the hook for all future damages, as the insurance company will drop your coverage.
Frequently Asked Questions (FAQ) About Roof Underlayment
Q: Is roof underlayment *really* necessary? My old shed doesn’t have it.
A: Yes, it is 100% necessary for a residential home. A shed is not a conditioned, insulated living space. Your home is. The underlayment is the only thing protecting your $50,000 wooden roof structure from the water that will inevitably get past your shingles. It is required by code, by warranty, and by common sense.
Q: What about these “roof rejuvenation” sprays like Roof Maxx? Do they fix underlayment?
A: No. Products like Roof Maxx are designed to be sprayed on *existing* asphalt shingles to restore their flexibility and oils. They do absolutely nothing for the underlayment *underneath* the shingles. If your underlayment has failed, no topical treatment can save it. The only fix is a full roof replacement.
Q: Can underlayment be used on a flat roof?
A: No. Flat roofs are a completely different science. They don’t use shingles or the underlayment we’ve discussed. They use monolithic membranes like TPO, EPDM, or modified bitumen that are heat-welded or adhered into a single, seamless “bathtub.” These systems are highly specialized, especially when considering if flat roofs are good for hurricanes, as their wind-uplift design is critical.
Q: How long can synthetic underlayment be exposed?
A: This is a major advantage. While #30 felt can be ruined by UV rays in 3-5 days, most quality synthetics (like the Tyvek product) can be left exposed for 90 to 180 days. This gives a DIYer or a contractor immense flexibility, allowing them to “dry in” the house and wait out a bad stretch of weather before installing the final shingles.
Q: My contractor wants to use staples. Is that okay?
A: No. This is a red flag. Staples tear the underlayment, have poor holding power against wind, and will *immediately* void your shingle manufacturer’s warranty. The only approved method is to use 1″ plastic or metal cap nails, either hand-nailed or with a pneumatic cap nailer. If your contractor is cutting this corner, where else are they cutting corners?
Q: I see some damage to my roof. Can I just patch the underlayment?
A: For a very small, isolated repair (like a single vent-boot replacement), it’s possible. You would need to gently remove the shingles, cut out the bad section of underlayment, and slide a new piece in, making sure to overlap it *under* the top layer and *over* the bottom layer. You would then seal all seams with a high-quality roofing tape or roof sealant. But this is a very advanced repair. For most significant damage, a full replacement of that roof plane is the only way to guarantee a long-term fix.
Q: I have a pest problem. Does underlayment help?
A: Indirectly. A rotted, water-damaged roof deck (caused by failed underlayment) is a soft, inviting entry point for pests. This is when you discover roof rats or squirrels in your attic. A sound roof deck, protected by a sound underlayment, is a hard barrier. It also supports other pest-control measures, like the proper installation of bird spikes, which need a solid base to anchor to.
The Final Word: Your Home’s Hidden Shield
The purpose of roof underlayment isn’t just “one thing”—it’s a system of five critical protections. It is your home’s last line of defense against water, the temporary roof that protects your build, the legal document that satisfies code, the specialized barrier that defeats ice dams, and a key component in your home’s fire safety.
When you’re getting quotes for a new roof, don’t let the contractor gloss over the underlayment. Ask them *what* type they’re using and *why*. A pro who proudly explains that they only use a high-quality synthetic and self-adhered ice shield is a pro who cares about quality. The contractor who says, “it’s all the same, so we use the cheap stuff,” is the one you should walk away from. The underlayment is an investment in the longevity and safety of your home. It’s the unsung hero, and now, you know its purpose.