
How to Find a Roof Leak in the Attic: A Master Guide for Homeowners
There is perhaps no sound more unsettling for a homeowner than the rhythmic, hollow plink-plink-plink of water hitting your ceiling during a midnight rainstorm. A roof leak is more than just a nuisance; it is a silent predator that, if left unchecked, can compromise your home’s structural integrity, foster toxic mold growth, and destroy expensive insulation. However, the path to fixing a leak doesn’t start on the shingles—it starts in the shadows of your attic.
Finding a leak in the attic is notoriously difficult because water rarely travels in a straight line. Gravity, surface tension, and the pitch of your roof rafters mean that the spot where water enters the outer shell is often dozens of feet away from where it eventually drips onto your ceiling. In this comprehensive guide, we will walk through the forensic process of tracking down elusive water entry points, the tools you need for the job, and the expert secrets to ensuring your home stays dry.
Whether you are dealing with a standard shingle roof or evaluating the metal roof vs shingles debate, the diagnostic principles in the attic remain remarkably similar. It requires patience, a keen eye for detail, and a systematic approach.
Phase 1: Preparation and Safety Measures
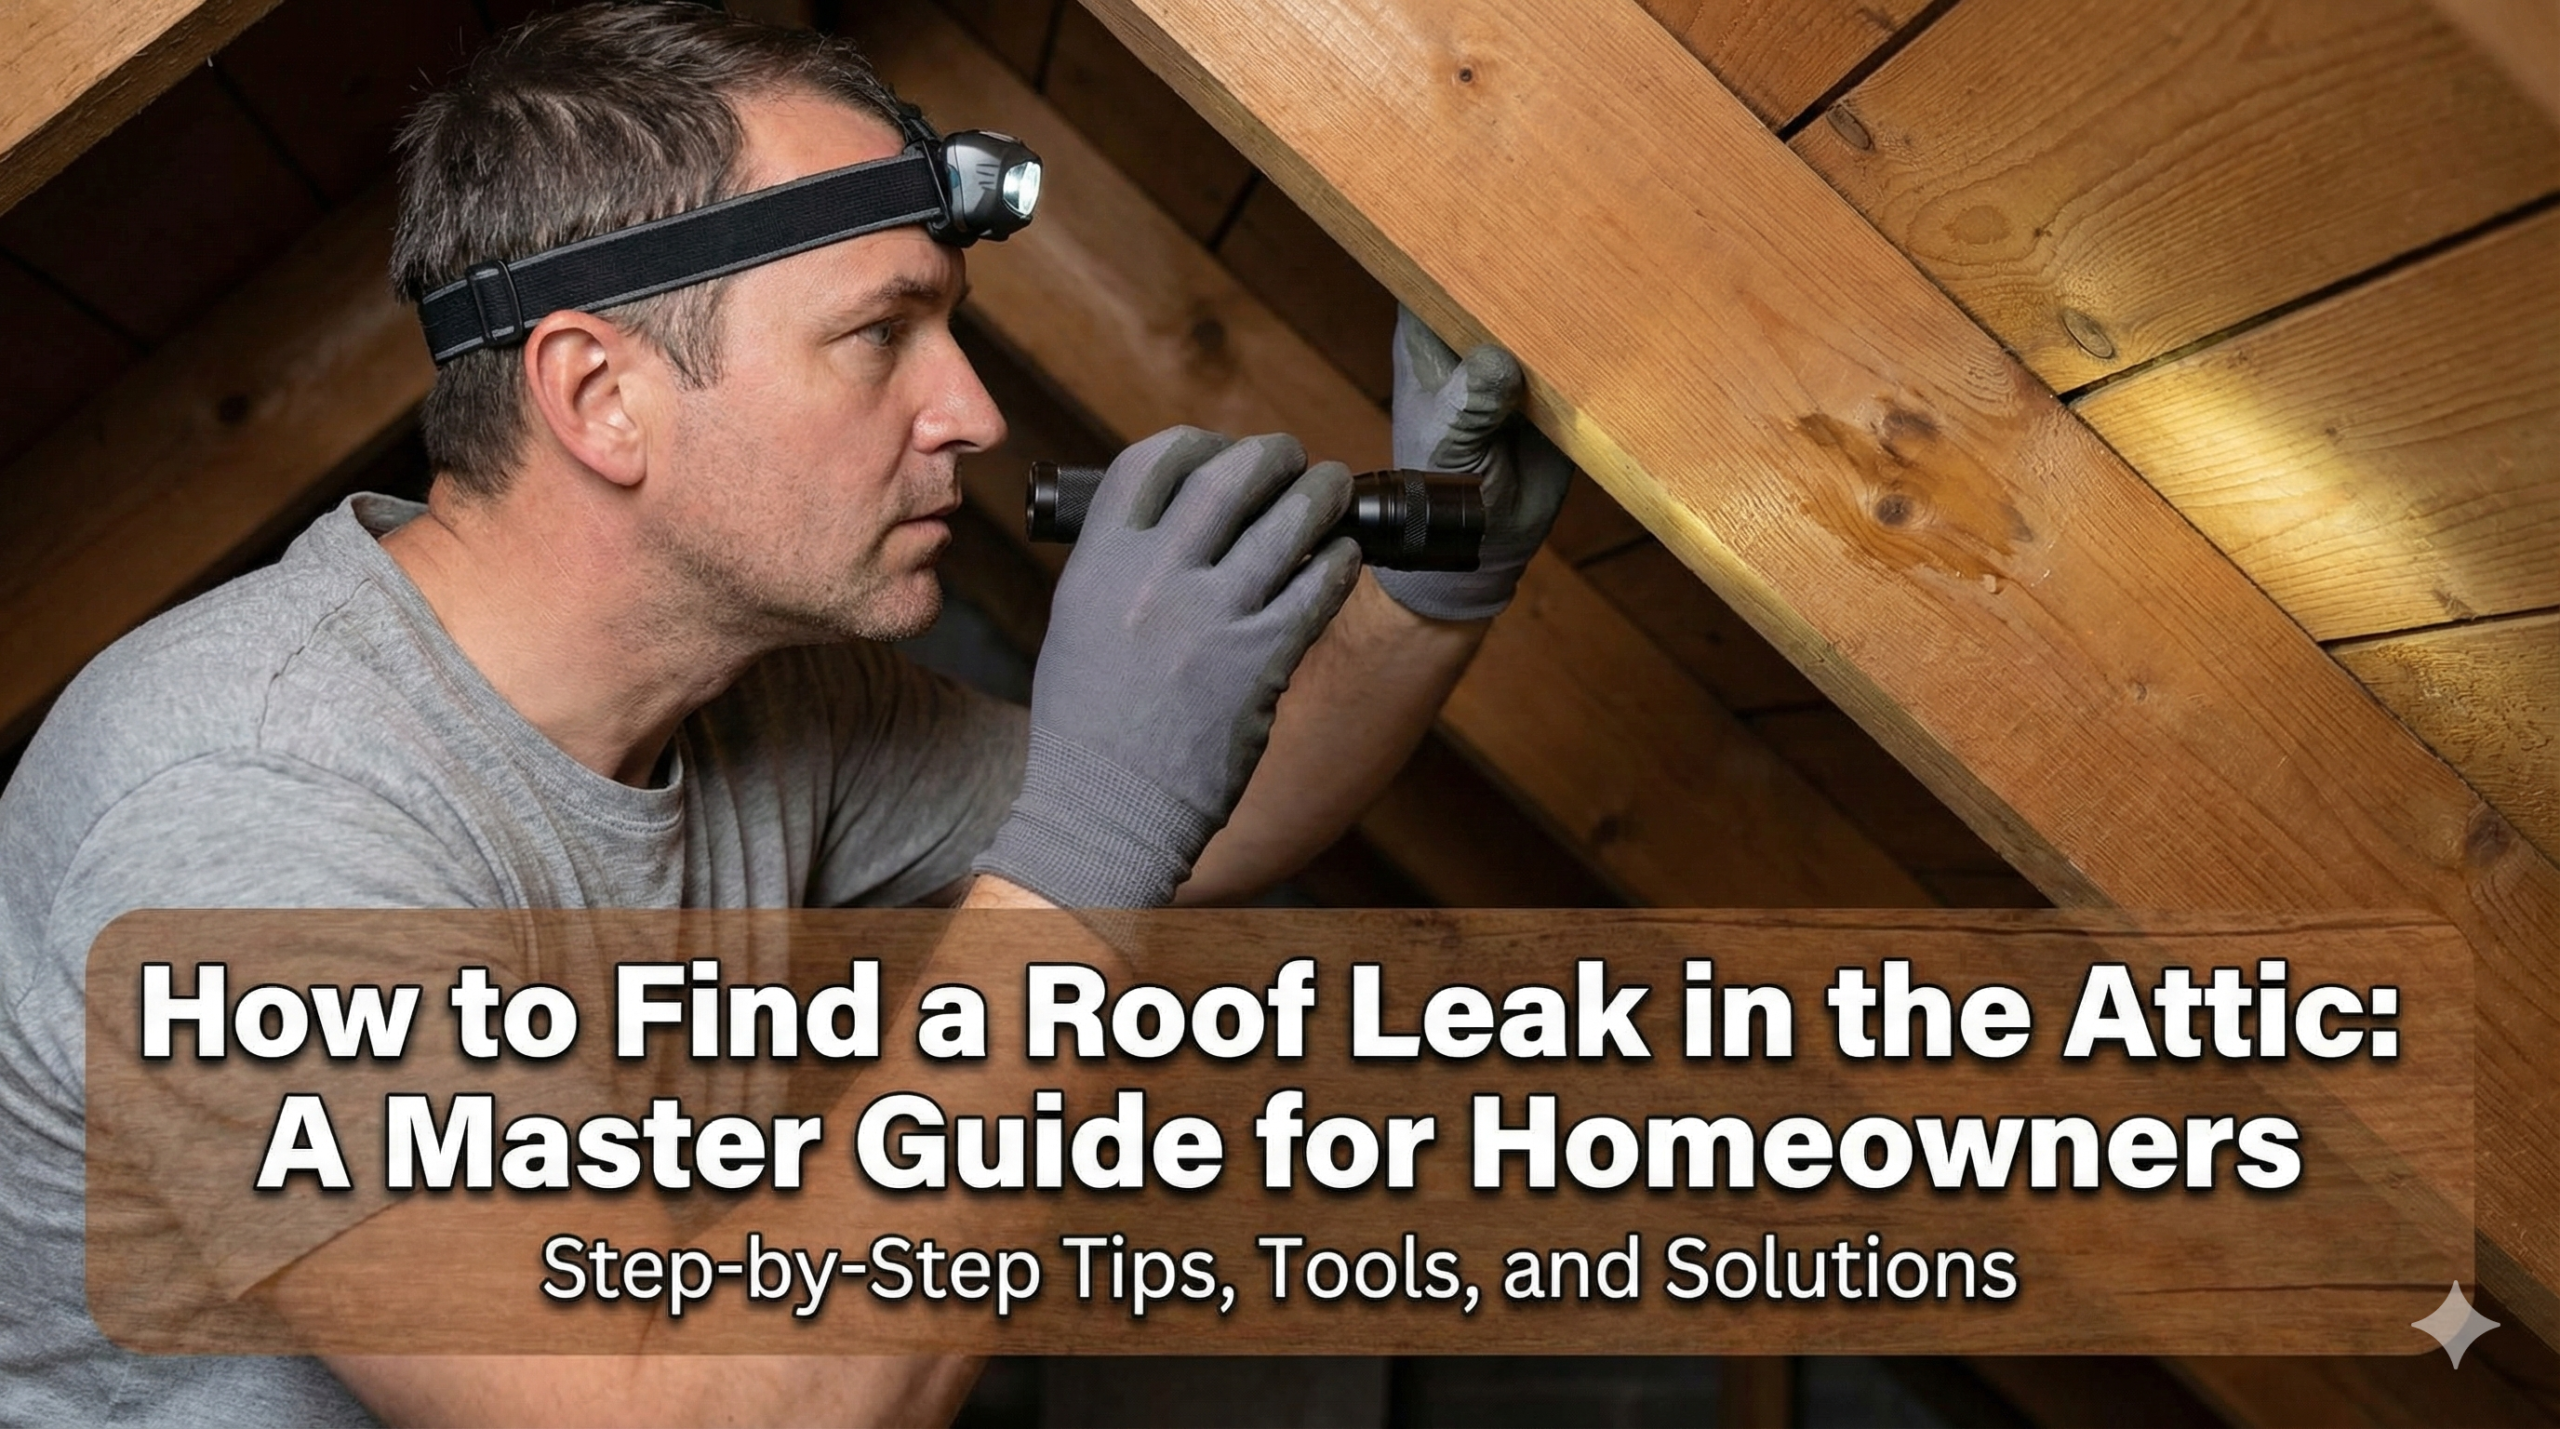
Before you dive head-first into the dusty corners of your attic, you must prepare. Attics are hazardous environments filled with protruding nails, fiberglass insulation that irritates the skin, and potentially unstable flooring. Safety is not optional; it is the foundation of a successful inspection.
The Essential Inspection Gear
Don’t go in empty-handed. You need a specific kit to identify moisture effectively:
- High-Lumen Flashlight: A standard phone light isn’t enough. You need a powerful LED beam to catch the shimmer of wet wood or the faint “trail” of dried water stains.
- Sturdy Ladder: Accessing the attic often requires height. Ensure you are using the best roof ladders or attic access ladders that are rated for your weight.
- Personal Protective Equipment (PPE): Wear a long-sleeved shirt, pants, gloves, and a mask (N95 or better) to avoid inhaling dust and insulation fibers.
- Footwear: Slip-resistant soles are vital. If you eventually need to transition from the attic to the rooftop, having the best roofing shoes will prevent dangerous falls.

Pro-Grade Inspection Flashlight
A high-intensity beam is critical for spotting “shiners” (frost-covered nails) and water streaks in dark attic corners.
Check Price on AmazonPhase 2: The Visual “Dry” Inspection
The best time to start your search is actually when it’s not raining. This allows you to look for historical evidence of water intrusion without the chaos of an active leak. You are looking for “telltale signs” that water has been there before.
1. Identifying “Water Trails” and Staining
Water leaves a fingerprint. Look for dark, tea-colored rings on the plywood sheathing or along the rafters. Because of surface tension, water often “runs” down the underside of a rafter until it hits a joint or a nail, where it then drips. Follow these stains upward toward the roof peak. If you see a stain, the leak source is almost always higher than the stain itself.
2. Hunting for “Shiners”
In cold weather, a “shiner” is a dead giveaway. This is a nail that missed the rafter during construction and is now sticking out into the attic. During winter, moisture from the house condenses on these cold nails, turning into frost. When the attic warms up, the frost melts, creating a drip that looks like a roof leak but is actually a ventilation issue. If you’re unsure about your ventilation, consider the best roof exhaust fans to regulate attic temperature.
3. Checking the Insulation
Pushed-down, matted, or discolored insulation is a red flag. Fiberglass insulation that has been wet often turns black or gray. If you find a wet spot in the insulation, remove it and look at the floor of the attic. If the wood underneath is rotting, the leak has been active for a long time.
| Sign of Leak | Likely Cause | Urgency Level |
|---|---|---|
| Black Mold on Rafters | Chronic slow leak or poor ventilation | High (Health Risk) |
| Rusty Nails (Shiners) | Condensation or small roof puncture | Medium |
| Tea-Colored Stains | Active or recurring water intrusion | Critical |
| Matted Insulation | Concentrated drip from a single point | High |
Phase 3: The “Rainy Day” or Hose Test Strategy
If the visual inspection doesn’t reveal the culprit, you need to see the leak in action. This is where the “Hose Test” comes in. This requires two people: one on the roof with a garden hose and one in the attic with a flashlight and a radio/phone.
Step-by-Step Hose Test Procedure
- Start Low: Have your helper spray water on the roof just above where you suspect the leak is. Do not spray the whole roof at once.
- Isolate Sections: Spray one area for at least 5-10 minutes. It takes time for water to soak through the roof underlayment and plywood to become visible in the attic.
- Communicate: As soon as the person in the attic sees a drip, they should signal the person outside to stop.
- Mark the Spot: Once found, push a nail or a thin wire up through the hole so you can identify the exact location from the outside later.

Digital Wood Moisture Meter
Unsure if a stain is old or active? A moisture meter tells you the exact water content of your rafters instantly.
Check Price on AmazonCommon Attic Leak Hotspots
When searching the attic, don’t just look at open stretches of plywood. Most leaks occur at “penetrations”—places where something breaks the surface of the roof.
1. Roof Vents and Ridge Vents
Plastic or metal vents can crack over time due to UV exposure. Check around the base of the vent inside the attic. If you have a metal roof, the best ridge vent for metal roof systems will have specialized gaskets that can eventually fail.
2. Plumbing Vent Boots
These are the rubber seals around the pipes that exit your roof. The rubber often rots or cracks long before the shingles do. From the attic, look for water running down the PVC or cast-iron pipe.
3. Chimneys and Crickets
Chimneys are notorious for leaking. If your chimney is wider than 30 inches, it should have a “cricket”—a small peaked structure behind the chimney to divert water. If you don’t know what is a roof cricket, it’s essentially a mini-roof that prevents water from pooling against the chimney masonry. Check the attic wood around the chimney for signs of flashing failure.
4. Valley Failures
The “valleys” where two roof planes meet carry a massive volume of water. If the roof underlayment in these valleys is compromised, you will see significant staining along the valley rafters in the attic.
Comparing Inspection Methods: DIY vs. Professional
DIY Attic Inspection
- Cost: Free (excluding tools).
- Convenience: Can be done immediately.
- Learning: You understand your home better.
Professional Inspection
- Accuracy: Use of thermal imaging/drones.
- Safety: No risk of you falling through a ceiling.
- Warranty: Most pros guarantee their leak detection.
If the leak is high up or the attic is too tight to navigate, you might consider the roof inspection cost vs. the potential damage of a missed leak. Professionals often use the best drone for roof inspections to see external damage that isn’t visible from the attic floor.
How to Temporarily Seal the Leak from the Attic
Once you’ve found the entry point, you might need a temporary “stop-gap” until a roofer arrives. While most repairs must be done from the outside, some minor issues can be mitigated from the inside.
- Roof Sealant: Applying the best roof sealant to the underside of the plywood can slow a leak, but it is rarely a permanent fix because water will just find a path around the sealant.
- Roofing Tape: For small punctures, the best roofing tape can be applied to the interior sheathing in an emergency to divert water into a bucket.
- Plywood Patch: Screwing a small piece of wood over a hole can provide structural support if the original wood is soft.

Emergency Waterproof Roof Sealant
Keep a tube of high-grade sealant on hand to prevent catastrophic water damage during a storm.
Check Price on AmazonLong-term Prevention and Maintenance
Finding a leak is great; preventing one is better. Regular maintenance is the key to longevity. This includes keeping gutters clear of debris so water doesn’t back up under the eaves—you can check out gutter guard reviews to see if they are right for your home. Furthermore, ensure you are removing biological growth; learning how to get rid of moss on roof surfaces prevents shingles from being lifted and allowing water in.
Frequently Asked Questions (FAQ)
Yes. In fact, a bright sunny day is perfect. Turn off all attic lights and look for “pinholes” of light coming through the roof. If light can get in, water can get in.
This usually indicates a “volume” issue, such as a failing valley or a clogged gutter that causes water to back up under the roof flashing.
Not necessarily. It can also be caused by poor ventilation, where moist air from your bathroom or kitchen is vented into the attic instead of outside.
A simple flashing or shingle repair might cost $300-$600. However, if the wood is rotted, costs can escalate. Check the roof replacement cost for a 3000 sq ft house if the damage is widespread.
Consult your insurance. However, be aware of what happens if I don’t use my insurance money to fix my roof, as it can lead to claim denials later.
Only if it’s safe and you have the right gear. Be especially careful with certain materials; for instance, can you walk on a tile roof? Generally no, as they crack easily. Metal roofs also require specific techniques.
Conclusion
Finding a roof leak in the attic is a game of persistence and observation. By following the “water trails,” performing a strategic hose test, and checking common hotspots like vents and chimneys, you can identify the source of the problem before it becomes a financial disaster. Remember, water damage is cumulative—the longer you wait, the more expensive the repair becomes.
Once you’ve identified the leak, your next step is a professional repair or a high-quality DIY fix using the right materials. Don’t let a small drip compromise your sanctuary. Armed with a good flashlight, a sturdy ladder, and this guide, you are ready to protect your home from the elements.