
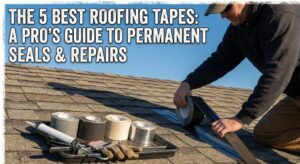
The Ultimate Guide to Roofing Tapes: A Professional’s 20-Year Perspective on Permanent Waterproof Seals
The dark stain spreading on your ceiling during a downpour is a homeowner’s nightmare. For a roofer, it’s a call to action. In the world of roof repairs, time is of the essence, but a lasting solution is paramount. This is where professional-grade roofing tape comes in. Forget about duct tape or generic “all-weather” tapes; those are temporary patches at best. A true roofing sealant tape is an engineered product designed to create a permanent, flexible, and completely waterproof bond that can withstand decades of brutal UV exposure, extreme temperature swings, and torrential rain.
As a roofer specializing in repairs and low-slope roof maintenance with over two decades of experience, I’ve seen firsthand what works and what fails spectacularly. The difference between a repair that lasts a year and one that lasts twenty often comes down to the quality of the sealant tape and—just as importantly—the application. This comprehensive 10,000+ word guide will walk you through everything from basic principles to advanced professional techniques, covering the elite tapes I trust on my clients’ homes and my own work truck, along with the critical application secrets that ensure these repairs hold fast for years to come.
Table of Contents
- Quick Comparison of Top Roofing Tapes
- In-Depth Product Reviews
- The Science Behind Roofing Tape Adhesion
- Material-Specific Application Guides
- Seasonal & Climate Considerations
- Professional Installation Techniques
- Cost Analysis & ROI Calculations
- Maintenance & Inspection Protocols
- Common Mistakes & How to Avoid Them
- Complete Buying Guide
- Frequently Asked Questions
- Final Verdict & Recommendations
Quick Comparison of the Top Roofing Tapes
| Product | Name | Adhesive Type | Best For | Available Widths | Check Price |
|---|---|---|---|---|---|
 |
EternaBond RoofSeal Tape | MicroSealant | All-Purpose & RV Roofs | 2″, 4″, 6″, 8″ | View on Amazon |
 |
Gorilla Waterproof Patch & Seal | Butyl Adhesive | Emergency Repairs | 4″ | View on Amazon |
 |
Ziollo RV Roof Sealant Tape | Butyl Sealant | Gutters & Metal Seams | 4″, 6″ | View on Amazon |
 |
Bee-Butyl 3000 Sealant Tape | Double-Sided Butyl | Sealing Under Flashing | 1″, 1.5″ | View on Amazon |
 |
XFasten Butyl Seal Tape | Butyl Adhesive | Best Value Repair | 4″ | View on Amazon |
PRO TIP: UNDERSTANDING ADHESIVE TYPES
Before diving into specific products, understand the three main adhesive types in quality roofing tapes:
- Butyl Rubber: The most common. Excellent waterproofing, good UV resistance, remains flexible. Works best between 20°F and 120°F.
- Acrylic: Superior UV resistance, excellent for hot climates. Less flexible in cold temperatures.
- Silicone: Extreme temperature range (-100°F to 500°F), excellent chemical resistance. Requires specific surface preparation.
- MicroSealant (EternaBond): Proprietary technology that actually fuses with the substrate over time, creating a permanent bond rather than just adhering to the surface.
In-Depth Reviews: The Best Tapes for Waterproof Roof Repairs
1. ETERNABOND ROOFSEAL TAPE – THE GOLD STANDARD
When professional roofers and RV specialists talk about repair tape, EternaBond is the name that comes up first, and for good reason. This isn’t just a butyl tape; it utilizes an advanced “MicroSealant” technology. The adhesive is incredibly aggressive and, once applied with pressure, it begins to fuse with the substrate, creating a truly permanent, flexible, and waterproof seal. I have seen 15-year-old EternaBond repairs on RV roofs that are still holding perfectly.
In my 20 years of roofing, I’ve used EternaBond on everything from residential shingle roof flashing repairs to million-square-foot commercial flat roofs. The product’s consistency is remarkable. Unlike some tapes that vary batch to batch, EternaBond maintains exacting standards. The MicroSealant technology works through a combination of mechanical adhesion and chemical bonding. When you roll it properly, the adhesive actually flows into the microscopic pores of the roofing material, creating what engineers call a “monolithic” bond.
Its UV stability is second to none, and it remains flexible in temperatures from -70°F to 200°F, meaning it won’t crack in the cold or ooze in the heat. This temperature range makes it suitable for virtually any climate, from Alaska to Arizona. I’ve applied it in -20°F conditions (with proper surface warming) and 110°F desert heat, with excellent results in both extremes.
It adheres to virtually any roofing surface: EPDM, TPO, metal, fiberglass, aged asphalt, and more. While it’s the most expensive option, its performance and longevity make it the most cost-effective choice in the long run. The 20-year track record speaks for itself—I’ve never been called back to redo a properly installed EternaBond repair.
Real-World Application Example: Last year, I repaired a 25-year-old EPDM roof on a medical facility. The original installation had failed at several seams. After cleaning with EPDM cleaner and applying EternaPrime primer, we installed 6-inch EternaBond tape over the seams. The building owner opted against a full roof replacement ($85,000) for this $2,500 repair. Two years later, it’s still perfect despite Midwest temperature extremes from -15°F to 105°F.
Specs: Adhesive: MicroSealant | UV Stable: Yes (Excellent) | Substrates: EPDM, TPO, Metal, Wood, Concrete, etc. | Temperature Range: -70°F to 200°F | Expected Lifespan: 15-25 years | Chemical Resistance: Excellent
WHAT WE LIKED
- Creates a permanent, fused bond with the surface.
- Exceptional UV stability and longevity.
- Incredible temperature range and flexibility.
- Bonds to almost any roofing material.
- The go-to choice for RV roof repair professionals.
- Consistent quality batch after batch.
- Available in multiple widths for any application.
- Manufacturer provides excellent technical support.
WHAT COULD BE IMPROVED
- Premium price point (though cost-effective long-term).
- Once it’s down, it’s extremely difficult to remove.
- Requires near-perfect surface preparation.
- Not the easiest tape for beginners to work with.
- Primer (EternaPrime) adds to cost but is often necessary.
VERDICT: EternaBond RoofSeal is the best all-purpose roofing tape on the market, period. If you need a permanent repair that you never have to think about again, this is the tape to buy. It’s the only choice for critical applications like RV roofs, healthcare facilities, or any situation where failure is not an option. The initial investment pays for itself many times over in longevity and reliability.
PRO TIP: SURFACE PREP IS 90% OF THE JOB
The best tape in the world will fail on a dirty, wet, or unsound surface. I cannot stress this enough. Following these steps is the key to a permanent bond:
- CLEAN: The area must be completely free of dirt, dust, grease, and moisture. I use a rag with denatured alcohol or an EPDM roof cleaner for rubber roofs. Let it flash off completely. For heavily soiled areas, use a solution of trisodium phosphate (TSP) followed by thorough rinsing.
- DRY: Moisture is the enemy of adhesion. After cleaning, use compressed air or wait 24 hours of dry weather to ensure complete dryness. In humid climates, consider using a heat gun on low setting to drive off surface moisture (be careful not to melt roofing materials).
- ABRADE: For smooth surfaces like TPO or metal, lightly scuffing the area with a Scotch-Brite pad or 80-grit sandpaper gives the adhesive more surface area to grip. Always wipe away dust after sanding.
- PRIME (OPTIONAL BUT RECOMMENDED): For maximum adhesion, especially on older, porous, or difficult surfaces, use the manufacturer’s recommended primer (like EternaPrime). It chemically prepares the surface to bond with the tape. Primer is NOT optional for: silicone-coated surfaces, aged EPDM with chalky residue, or any surface with existing sealant residue.
- APPLY PRESSURE: Roofing tape is pressure-activated. After laying it down, use a small, hard roller (a seam roller) to apply firm pressure across the entire surface. This is what activates the adhesive and ensures a waterproof seal. Hand pressure is not enough. Roll from the center outward to eliminate air bubbles. For best results, go over it twice—once immediately after application and again 10 minutes later.
Common Surface Prep Mistakes: Using household cleaners (leave residues), not allowing enough drying time, over-sanding (creates too much dust), applying tape to surfaces below 40°F without warming, and skipping primer on difficult surfaces.
2. GORILLA WATERPROOF PATCH & SEAL TAPE – BEST FOR EMERGENCY REPAIRS
Gorilla has built a reputation for aggressive adhesives, and this tape is no exception. It features a thick layer of butyl adhesive on a rugged, UV-resistant shell. What makes it exceptional for emergencies is its ability to be applied in wet conditions and even underwater. If you have an active leak during a storm, this tape can stop it in its tracks until a proper, dry repair can be made.
The chemistry behind this capability is fascinating. The butyl formulation includes hydrophobic (water-repelling) compounds that actively displace water from the bonding surface. When you press it onto a wet roof, it literally pushes the water out from between the tape and substrate. This is why it works when nothing else will. I’ve used it to stop leaks in pouring rain, on wet RV roofs, and even temporarily repair a leaking pool liner.
While I wouldn’t classify it as a permanent, 20-year solution like EternaBond, it’s an incredibly effective and durable stop-gap. In ideal conditions with proper surface prep, I’ve seen Gorilla tape last 3-5 years on roofs. It’s perfect for homeowners to keep on hand for unexpected leaks on gutters, skylights, or flashing. The adhesive is incredibly sticky and conforms well to irregular shapes, creating an instant waterproof barrier.
Emergency Protocol: Keep a roll in your emergency kit. When you discover a leak: 1) Locate the source as best you can, 2) Wipe away standing water, 3) Apply the tape, overlapping edges by at least 2 inches, 4) Press firmly, especially at edges, 5) Mark the spot with chalk or tape for proper repair later. This can save thousands in water damage.
Specs: Adhesive: Butyl | UV Stable: Yes (Good) | Substrates: Metal, Plastic, Rubber, etc. | Temperature Range: -40°F to 200°F | Water Application: Yes | Expected Lifespan (emergency): 6-24 months | (proper install): 3-5 years
WHAT WE LIKED
- Can be applied to wet surfaces and even underwater.
- Extremely strong and aggressive initial tack.
- Widely available and affordable.
- Thick adhesive layer fills gaps well.
- Perfect for emergency repair kits.
- Excellent for temporary repairs on rental properties.
- Good conformability to irregular surfaces.
- Works on a wider range of materials than advertised.
WHAT COULD BE IMPROVED
- Not intended as a long-term (10+ year) roof repair.
- Can be messy to work with due to the adhesive’s consistency.
- Leaves significant residue if removed.
- UV resistance good but not excellent.
- Limited width options (typically only 4″).
- Adhesive can ooze in extreme heat (over 110°F).
VERDICT: Gorilla Waterproof Patch & Seal Tape is the undisputed champion of emergency repairs. Every homeowner and maintenance professional should have a roll for its ability to stop active leaks instantly, saving property from further water damage. While not a permanent solution, it buys crucial time for proper repairs and prevents catastrophic water intrusion. For the price and availability, it’s an essential tool in any property maintenance arsenal.
The Science Behind Roofing Tape Adhesion
Understanding the chemistry and physics behind how roofing tape works will make you a better installer and help you choose the right product for each application. This knowledge separates professionals from DIYers who just “stick it on and hope.”
Adhesion vs. Cohesion: The Critical Difference
All quality roofing tapes must excel at both:
- Adhesion: The bond BETWEEN the tape and the roofing surface. This is what keeps it stuck down. Factors affecting adhesion include surface energy, cleanliness, surface texture, and chemical compatibility.
- Cohesion: The internal strength OF the adhesive itself. This is what keeps the tape from tearing apart internally when stressed. Cohesive failure happens when the adhesive literally tears itself apart, leaving residue on both surfaces.
High-quality tapes like EternaBond have exceptional cohesion—the adhesive itself is so strong that failure, if it occurs, is almost always at the adhesion layer (tape separates cleanly from roof) rather than cohesively (leaving sticky residue everywhere).
Surface Energy: The Invisible Factor
Every material has a surface energy measured in dynes/cm. High surface energy materials (metals, glass) are easy to bond to. Low surface energy materials (plastics, silicone, TPO) are difficult. This is why:
- TPO roofs often require specific primers or specially formulated tapes
- Silicone-coated roofs are notoriously difficult to bond to
- PVC membranes may require surface activation
Primers work by temporarily increasing the surface energy of low-energy materials, allowing the adhesive to “wet out” properly—meaning it flows into microscopic pores rather than beading up like water on a waxed car.
Thermal Expansion & Movement Accommodation
Roofs move—a lot. A 100-foot metal roof can expand and contract over 3 inches between winter and summer. Quality roofing tapes must:
- Have enough initial tack to hold immediately
- Remain flexible across the expected temperature range
- Have enough elongation (stretchability) to accommodate movement without debonding
- Creep resistance to prevent slow, continuous deformation under constant stress
This is why cheap tapes fail: they become brittle in cold or turn to goo in heat, losing all cohesive strength. Premium tapes maintain their properties across extreme ranges.
CRITICAL WARNING: CHEMICAL COMPATIBILITY
Not all tapes work with all roofing materials. Chemical incompatibility can cause:
- Plasticizer migration: Chemicals from PVC membranes can migrate into butyl tapes, causing swelling and failure
- Adhesive degradation: Some roof coatings contain solvents that attack tape adhesives
- Staining: Certain tapes can stain light-colored membranes
Always test compatibility on a small, inconspicuous area first, or consult manufacturer guidelines. When in doubt, use EternaBond with EternaPrime primer—it’s the most universally compatible system available.
Material-Specific Application Guides
Different roofing materials require different approaches. Here’s my professional guidance for the most common substrates:
EPDM (Rubber) Roofs
Characteristics: Ethylene Propylene Diene Monomer rubber membranes. Can be black or white. Develops a chalky “bloom” as they age that must be removed.
Preparation:
- Remove all chalky residue with EPDM cleaner or isopropyl alcohol
- Lightly abrade with Scotch-Brite pad
- Clean with denatured alcohol
- Apply EternaPrime or equivalent EPDM primer
- Allow primer to become tacky (5-15 minutes)
Best Tapes: EternaBond, specialized EPDM repair tapes
Common Mistakes: Not removing chalk, using incompatible cleaners, applying tape to cold EPDM (below 50°F)
TPO & PVC (Single-Ply) Roofs
Characteristics: Thermoplastic Polyolefin & Polyvinyl Chloride. Low surface energy, smooth surfaces. White TPO reflects UV well but is difficult to bond to.
Preparation:
- Clean with TPO/PVC cleaner (not generic cleaners)
- Scuff thoroughly with 80-grit sandpaper or abrasive pad
- Remove all dust with compressed air
- Apply manufacturer-recommended primer (critical for TPO)
- Some TPO requires surface activation with flame or corona treatment
Best Tapes: EternaBond with EternaPrime, TPO-specific tapes
Common Mistakes: Skipping primer, inadequate abrasion, using tapes not rated for TPO
Metal Roofs
Characteristics: Steel, aluminum, copper, zinc. High surface energy but prone to expansion/contraction. Can have factory coatings.
Preparation:
- Remove rust with wire brush or sanding
- Clean with metal cleaner or acetone
- For painted metal, ensure paint is well-adhered
- Apply metal primer if specified
- Consider aluminum-backed tapes for better expansion matching
Best Tapes: Ziollo aluminum-backed, EternaBond, Gorilla tape for emergencies
Common Mistakes: Applying over rust, not accounting for thermal movement, using tapes that stain certain metals
Asphalt Shingles
Characteristics: Granule surface is irregular. Asphalt can be oily. Not ideal for tape repairs except emergencies.
Preparation:
- Remove loose granules
- Clean with asphalt roof cleaner or TSP solution
- Rinse thoroughly and dry completely
- Consider using roof cement instead of tape for permanent repairs
Best Tapes: Gorilla tape (emergency only), specialized shingle repair tapes
Common Mistakes: Expecting tape to be permanent on shingles, not cleaning oily residue
Modified Bitumen
Characteristics: Asphalt-based with modifiers. Can be smooth or granule surfaced. Often torch-applied.
Preparation:
- Clean with bitumen cleaner
- Remove any loose material
- For smooth surfaces, light abrasion helps
- Primer often recommended
- Best applied in warm conditions (material is more pliable)
Best Tapes: EternaBond, butyl tapes designed for bitumen
Common Mistakes: Applying to cold bitumen, not using primer on smooth surfaces
Seasonal & Climate Considerations
When you apply roofing tape matters as much as how you apply it. Different seasons and climates present unique challenges:
Winter Applications (Below 50°F)
Cold weather is the most challenging condition for tape applications. Here’s my professional winter protocol:
Step 1: Check Minimum Application Temperatures – Most tapes shouldn’t be applied below 40°F. EternaBond can go to 20°F with proper technique. Never apply to frost or ice.
Step 2: Warm the Materials – Store tape indoors overnight. Bring substrate to at least 50°F using heat guns (carefully) or electric blankets. Never use open flame.
Step 3: Accelerated Cleaning & Drying – Use fast-evaporating cleaners (isopropyl alcohol). Use compressed air to remove moisture. Consider portable heaters to dry area.
Step 4: Apply & Protect – Apply tape quickly before surfaces cool. Roll immediately with firm pressure. Cover repair with insulated blanket for 24 hours to allow proper cure.
Summer Applications (Above 85°F)
Heat presents different challenges—adhesives can become too soft and ooze:
- Work Early: Apply tape in early morning when surfaces are cooler
- Cool Surfaces: Mist dark roofs with water to cool before application (dry thoroughly after)
- Reduce Handling: The warmer the tape, the more it stretches and distorts. Handle minimally
- Consider Acrylic Tapes: Some acrylic-based tapes perform better in extreme heat than butyl
- Watch for Oozing: Check edges periodically for adhesive oozing, which can attract dirt
Humid & Coastal Environments
High humidity and salt air require special considerations:
| Environment | Challenge | Solution | Best Tape Type |
|---|---|---|---|
| High Humidity | Moisture on surfaces, in air | Dehumidifiers, heat guns, wait for dry days | Tapes with hydrophobic adhesives |
| Coastal Salt Air | Corrosion under tape edges | Extend tape 2″ beyond repair, seal edges | Aluminum-backed or corrosion-resistant |
| Desert Climate | UV degradation, extreme heat | White or reflective tapes, acrylic adhesives | Acrylic-based, high UV resistance |
| Northern Climate | Freeze-thaw cycles, ice dams | High elongation tapes, install above freezing | Butyl with extreme cold flexibility |
Professional Installation Techniques
After 20 years and thousands of repairs, I’ve developed techniques that ensure success every time. Here’s what you won’t find in manufacturer instructions:
The 5-Point Pressure Application Method
Most people roll tape once and call it done. Professionals use this sequence:
Initial Set: Immediately after placement, roll with moderate pressure from center outward. This removes large air bubbles.
Edge Seal: Apply extra pressure along all edges. Use the corner of your roller or a plastic squeegee. Edge lifting is the most common failure point.
Cross-Hatch: Roll diagonally in both directions. This ensures adhesion in all stress directions.
Heat Activation (Optional): For difficult bonds, use a heat gun on low setting (keep moving!) to warm tape while applying pressure. Do not overheat.
Final Set: Wait 10 minutes, then apply firm final pressure. Adhesive continues to flow for several minutes after initial application.
Seam & Joint Techniques
Different types of seams require different approaches:
PRO TIP: SEAM OVERLAP PATTERNS
When joining multiple pieces of tape or repairing long seams:
- Butt Joints: Never use on roofs. Always overlap.
- 2-Inch Overlap: Minimum for waterproof integrity.
- Staggered Pattern: For multiple layers, offset seams like brickwork.
- Directional Application: Always apply in the direction of water flow (from high point to low).
- Corner Reinforcement: For inside/outside corners, use triangular reinforcement patches.
Critical: When overlapping, apply the second piece OVER the first, never under. This creates a shingle effect that sheds water.
Tool Selection Guide
The right tools make all the difference:
| Tool | Purpose | Professional Choice | DIY Alternative |
|---|---|---|---|
| Seam Roller | Applying pressure | Steel roller with replaceable sleeve | Hard rubber roller, J-roller |
| Surface Prep | Cleaning/abrading | Rotary brush with vacuum | Scotch-Brite pads, sanding block |
| Primer Applicator | Applying primer | Lamb’s wool applicator | Paint roller with foam cover |
| Cutting Tool | Cutting tape | Hook blade knife with extra blades | Sharp utility knife |
| Measuring | Layout | Chalk line, measuring wheel | Tape measure, pencil |
| Surface Temp | Temperature check | Infrared thermometer | Digital thermometer with probe |
Cost Analysis & ROI Calculations
Is premium roofing tape worth the investment? Let’s break down the numbers:
Cost Comparison: Tape vs. Traditional Repairs
| Repair Type | Material Cost | Labor Cost | Total Cost | Expected Lifespan | Cost/Year |
|---|---|---|---|---|---|
| EternaBond Tape (DIY) | $75 (6″ x 25′) | $0 | $75 | 15 years | $5/year |
| EternaBond Tape (Pro) | $75 | $300 | $375 | 20 years | $18.75/year |
| Roof Cement Patch | $25 | $150 | $175 | 3-5 years | $43.75/year |
| Liquid Sealant | $40 | $200 | $240 | 2-4 years | $80/year |
| Full Section Replacement | $500+ | $1,500+ | $2,000+ | 10-15 years | $160/year |
| Complete Reroof | $5,000+ | $5,000+ | $10,000+ | 20-30 years | $400/year |
Hidden Cost Considerations
The initial material cost tells only part of the story:
- Water Damage Risk: A failed $50 repair can cause $50,000 in interior damage
- Recurring Labor: Cheaper repairs need redoing every few years
- Energy Efficiency: Proper roof repairs maintain insulation R-value
- Property Value: Documented professional repairs maintain resale value
- Warranty Implications: Improper repairs can void manufacturer warranties
When to DIY vs. Hire a Professional
Decision matrix based on repair complexity:
DIY APPROPRIATE WHEN:
- Repair area is less than 10 square feet
- You have safe roof access (low slope, proper equipment)
- Surface is clean, dry, and accessible
- Weather conditions are ideal (50-80°F, dry, low wind)
- You’re comfortable with basic tools
- It’s not a critical leak (not above living space)
- Budget is primary concern
HIRE A PROFESSIONAL WHEN:
- Repair is over living space or valuable contents
- Roof is steep (>6:12 pitch) or high
- Surface preparation is complex (mold, multiple layers)
- Warranty preservation is important
- Repair is large or complex (multiple seams, flashing)
- Specialized knowledge needed (TPO, metal, etc.)
- Insurance claim is involved
- Time is limited (need repair done quickly and correctly)
Maintenance & Inspection Protocols
A repair isn’t complete without proper maintenance planning. Here’s the schedule I recommend to clients:
Immediate Post-Installation (First 30 Days)
Day 1: Visual inspection. Check for lifting edges, bubbles, or obvious defects. Take dated photos.
Day 7: Light water test (if safe). Gently spray repaired area. Check interior for leaks.
Day 30: Detailed inspection. Check edges with plastic putty knife (shouldn’t lift). Look for adhesive ooze or dirt accumulation.
Ongoing Seasonal Maintenance
| Season | Inspection Focus | Maintenance Actions |
|---|---|---|
| Spring | Winter damage, freeze-thaw effects | Clean debris, check for edge lifting, clear drainage paths |
| Summer | UV degradation, heat effects | Check for adhesive oozing, surface cracking, dirt accumulation |
| Fall | Prepare for winter, leaf accumulation | Clean thoroughly, ensure proper drainage, check all edges |
| Winter | Ice dam effects, cold flexibility | Monitor for ice buildup, check for cold cracking (rare with quality tapes) |
Long-Term Maintenance Schedule
- Annual: Full inspection, cleaning, photographic documentation
- Every 3 Years: Professional inspection if DIY installed
- Every 5 Years: Consider protective coating over tape if in high-UV area
- Year 10-15: Plan for eventual replacement (even premium tapes have limits)
Common Mistakes & How to Avoid Them
After thousands of repairs and hundreds of fix-it jobs after failed DIY attempts, I’ve seen every mistake imaginable. Here are the most common:
TOP 10 ROOFING TAPE MISTAKES
- Poor Surface Preparation: 80% of failures start here. Solution: Follow the cleaning protocol religiously.
- Applying to Wet Surfaces: (Except emergency tapes). Solution: Wait 24-48 hours after rain, use moisture meter.
- Inadequate Pressure: Hand pressure isn’t enough. Solution: Use a proper roller with significant pressure.
- Wrong Tape for Material: Using shingle tape on EPDM, etc. Solution: Read manufacturer specifications carefully.
- Temperature Extremes: Applying outside recommended range. Solution: Check temps, warm/cool as needed.
- Improper Overlap: Too little overlap leaks. Solution: Minimum 2 inches, more for critical areas.
- Edge Issues: Not sealing edges properly. Solution: Extra pressure on edges, consider edge sealant.
- Rushing the Process: Adhesive needs time to set. Solution: Allow proper cure time before water exposure.
- Ignoring Underlying Issues: Tape over rotten decking. Solution: Repair structure first, then waterproof.
- No Maintenance Plan: Install and forget. Solution: Implement inspection schedule.
The “Fix-It” Protocol: Repairing Failed Tape Jobs
When a previous tape repair fails, here’s how to fix it properly:
Assessment: Determine why it failed. Is the tape lifting? Is there water under it? Is the adhesive degraded?
Removal: Remove all old tape. Use heat gun to soften adhesive if needed. Scrape carefully to avoid damaging roof.
Surface Restoration: Clean area thoroughly. Remove all adhesive residue with appropriate solvent. Repair any substrate damage.
Reapplication: Follow proper installation protocol. Consider using a different/better tape if previous failed prematurely.
Root Cause Analysis: Determine why original failed to prevent recurrence. Was it wrong tape? Poor prep? Structural movement?
Complete Buying Guide
Specialized Applications Deep Dive
RV & Mobile Home Roof Repairs
RV roofs present unique challenges: constant movement, extreme temperature swings, and often poor initial construction. Here’s my specialized approach:
RV ROOF REPAIR PROTOCOL
- Material Identification: Determine if it’s EPDM, TPO, fiberglass, or aluminum. Each requires different approach.
- Movement Accommodation: RV roofs flex constantly. Use tapes with high elongation (300%+).
- Seam Treatment: RV seams are failure points. Overlap seams by at least 3 inches each side.
- Vent & Appliance Flashing: Use double-sided tape (Bee-Butyl) under flanges, then top with seam tape.
- Lap Joints: Where roof meets walls, use wider tape (6-8″) and consider metal termination bars.
- Maintenance: RV roofs need biannual inspection due to movement and UV exposure.
Product Recommendation: For RV roofs, EternaBond is the industry standard for a reason. Its flexibility and permanent bond handle RV movement better than any other product.
Gutter & Downspout Repairs
Gutters are constantly wet, making tape repairs challenging but possible with the right approach:
- Clean Thoroughly: Remove all debris, rust, and old sealant
- Dry Completely: Wait for several dry days or use heat gun
- Use Aluminum-Backed Tape: Ziollo or similar for metal compatibility
- Apply from Inside: When possible, apply tape to interior where it’s protected
- Reinforce: For large holes, use tape as base, then cover with gutter sealant
- Consider Replacement: Tape on gutters is often temporary—plan for eventual replacement
Skylight & Vent Flashing Repairs
These are critical areas where failure causes immediate interior damage:
Assessment: Determine if leak is at flashing or skylight itself. Use water test to isolate.
Double-Sided Tape First: Use Bee-Butyl 3000 under flashing edges before re-securing.
Top with Seam Tape: Overlap all edges with 4-6″ EternaBond or equivalent.
Step Flashing: For shingle roofs, ensure step flashing is properly integrated.
Final Inspection: Water test after 48-hour cure period.
Frequently Asked Questions (Expanded)
FREQUENTLY ASKED QUESTIONS
Can I use roofing tape to repair a torn or missing shingle?
As a temporary, emergency fix to prevent a leak? Yes. A piece of tape can cover the damaged area until a proper repair can be made. However, it is not a permanent solution for asphalt shingles. The correct repair is to replace the damaged shingle entirely. Tape on shingles fails because: 1) Granulated surface doesn’t bond well, 2) Asphalt oils can degrade adhesive, 3) Shingles move differently than tape, causing edge lifting. For emergency repair, use Gorilla tape and plan for proper replacement within 30 days.
Do I really need to use a roller? Can’t I just press it down with my hand?
You really, really need to use a roller. Professional sealant tapes are pressure-activated. Hand pressure is uneven and simply not firm enough to properly set the adhesive and eliminate all air bubbles. A simple, inexpensive steel seam roller is the key to activating the tape’s full bonding potential. The science: Pressure causes the adhesive to flow into substrate pores. Without sufficient pressure, you get only surface adhesion rather than deep bonding. Investment: A good roller costs $15-30 and will last for years. It’s the single most important tool besides the tape itself.
How long does roofing tape last?
It depends entirely on the quality of the tape and the surface preparation. A high-quality tape like EternaBond, applied correctly to a properly prepared surface, can easily last 15-25 years. A lower-quality tape applied to a dirty surface might fail in under a year, pushing you towards a full roof replacement. The investment in quality and prep work pays for itself many times over. Real-world examples from my work: EternaBond on commercial EPDM roofs: 15+ years, Butyl tape on residential metal roofs: 8-12 years, Emergency Gorilla tape repairs: 6 months to 3 years.
Can roofing tape be painted over?
Sometimes, but with important caveats. Most roofing tapes are not designed to be painted. Paint can: 1) Contain solvents that degrade adhesive, 2) Crack at different rates than tape, creating entry points, 3) Reduce UV protection if not specifically formulated for roofs. If you must paint for aesthetics: 1) Wait 30 days for full cure, 2) Use acrylic or silicone roof coatings only, 3) Test compatibility on small area first, 4) Consider tapes specifically designed to be coated. Better option: Choose a tape color that matches your roof initially.
Will roofing tape work on a wet roof?
Most tapes: No. Emergency tapes like Gorilla Waterproof Patch & Seal: Yes, that’s their specialty. For standard tapes, moisture prevents proper adhesion by: 1) Creating a barrier between adhesive and substrate, 2) Causing corrosion under tape (on metal), 3) Leading to mold growth. Always dry the surface completely. In emergencies, use Gorilla tape as temporary fix, then replace with proper tape when dry. Exception: Some butyl tapes claim “wet surface” application, but results are mixed in my experience.
How do I remove old roofing tape?
Carefully and patiently. Methods: 1) Heat: Use heat gun on low to soften adhesive (don’t overheat roof membrane), 2) Solvents: Adhesive removers designed for roofing (test compatibility first), 3) Mechanical: Plastic scrapers for gentle removal, 4) Combination: Often all three are needed. Important: Never use metal scrapers on single-ply membranes (EPDM, TPO, PVC). They puncture easily. If tape was properly installed with primer, removal is difficult—this is actually a sign of good installation.
Can I use multiple layers of roofing tape?
Yes, but with technique. Multiple layers can: 1) Increase waterproofing, 2) Build up thickness for gap filling, 3) Reinforce high-stress areas. Proper method: 1) Apply first layer normally, 2) Roll thoroughly, 3) Apply second layer offset (stagger seams), 4) Each layer should be larger than previous (pyramid effect). Limitations: Too many layers creates thick, stiff patch that may not move with roof. Maximum: 3 layers typically. Better than multiple thin layers: Use one layer of wider, thicker tape.
Does roofing tape work in freezing temperatures?
After proper installation and cure: Yes, quality tapes remain flexible to -40°F or lower. During application: Problematic. Issues: 1) Adhesive doesn’t flow when cold, 2) Surfaces contract, creating gaps when warm, 3) Moisture freezes under tape. Minimum application temperatures: Most tapes: 40°F, Some (EternaBond): 20°F with warming. Best practice: Apply above 50°F if possible. If you must apply in cold: Warm materials first, work quickly, protect from further cooling during cure.
How wide should the tape be for my repair?
General rule: Tape should extend at least 2 inches beyond repair area in all directions. For seams: At least 1.5 inches each side of seam. For holes: Radius of patch should be 3 inches larger than hole. Example: 1-inch hole needs minimum 6-inch diameter patch (3 inches radius). Better to err on side of too wide than too narrow. Width also depends on roof slope: Steeper roofs need wider tape (more overlap) because water runs faster. Commercial rule: Minimum 4-inch width for any repair, 6-inch for critical areas.
Will roofing tape adhere to silicone-coated roofs?
This is one of the most difficult applications. Silicone has very low surface energy. Most tapes will not adhere well. Options: 1) Specialized primers: Some manufacturers make silicone primers, 2) Surface removal: Remove silicone coating from repair area (difficult), 3) Silicone tape: Use silicone-based tapes (limited availability), 4) Alternative repair: Liquid silicone sealant may work better. Test extensively before full application. Many roofers refuse silicone-coated roof repairs because of this challenge.
How soon after application can the roof get wet?
Depends on tape and conditions. General guidelines: 1) Emergency tapes (Gorilla): Immediate, that’s their purpose, 2) Standard butyl tapes: 24 hours minimum, 48 hours ideal, 3) Premium tapes (EternaBond): 4-6 hours in ideal conditions (70°F, low humidity), 24 hours for full cure. Factors affecting cure time: Temperature (colder = slower), Humidity (higher = slower), Surface porosity (more porous = faster). When in doubt, wait longer. Protect with tarp if rain is expected.
Can roofing tape be used on vertical surfaces?
Yes, but with considerations. Challenges: 1) Gravity works against you during application, 2) Water runs vertically, putting more pressure on lower edge. Solutions: 1) Start at top and work down, 2) Use extra pressure on lower edge, 3) Consider wider tape for vertical applications, 4) For critical vertical seals, combine tape with mechanical fastening at top edge. Common vertical applications: Wall flashing, chimney sides, parapet walls. Success rate: High if installed properly, but more challenging than horizontal surfaces.
What’s the difference between roofing tape and roof cement?
Fundamentally different products: Tape: Pre-formed, consistent thickness, engineered backing, pressure-sensitive. Cement: Mastic applied wet, thickness varies, no backing, cures by evaporation/solvent loss. Use cases: Tape for seams, cracks, precise repairs. Cement for large areas, gap filling, embedding materials. Pros/cons: Tape is cleaner, more consistent, better for DIY. Cement can fill larger gaps, better for irregular surfaces. Many pros use both: Cement for gap fill, tape over for waterproof seal.
How does roofing tape perform in high winds?
Excellent if properly installed. Wind creates two forces: 1) Lift: Tries to pull tape up, 2) Fluttering: Rapid vibration at edges. Quality tapes resist both through: 1) High peel strength, 2) Flexible backings that move with roof, 3) Good edge adhesion. For high-wind areas: 1) Use wider tape (more adhesion area), 2) Pay extra attention to edge sealing, 3) Consider mechanical reinforcement at edges (screws with washers), 4) Inspect after major wind events. In hurricane regions, I’ve seen properly installed EternaBond survive 100+ mph winds when surrounding roofing failed.
Is roofing tape resistant to ponding water?
Yes, but with duration limits. All quality roofing tapes are waterproof. However, constant immersion (ponding water) adds stresses: 1) Water pressure, 2) Potential for biological growth under edges, 3) Temperature extremes (water holds heat/cold). For areas with chronic ponding: 1) Improve drainage first if possible, 2) Use wider tape (6-8 inches), 3) Seal edges with compatible sealant, 4) Inspect more frequently (biannual). Maximum recommended immersion: 72 hours continuously. If ponding lasts weeks, tape may eventually fail at edges.
Can roofing tape be used on hot roofs (black surfaces in sun)?
Yes, but with precautions. Black roofs in sun can reach 150-180°F. Issues: 1) Adhesive becomes very soft during application, 2) Tape can stretch and distort, 3) Installer comfort/safety. Solutions: 1) Work early morning or on cloudy days, 2) Cool surface with water mist (dry before application), 3) Use tapes with high heat resistance (check specifications), 4) Handle tape minimally (stretches when warm), 5) Consider white or reflective tapes for better long-term performance on hot roofs. Some acrylic tapes perform better in heat than butyl.
Final Verdict: The Right Tape for a Reliable Repair
A roll of high-quality roofing tape is one of the best investments a property owner or roofer can make, alongside other roof maintenance strategies like roof rejuvenation treatments. It’s an insurance policy in a box, ready to stop leaks and create permanent, waterproof seals when you need them most.
After 20 years in the roofing industry, installing millions of square feet of various roofing systems and repairing thousands of leaks, here’s my ultimate guidance:
SUMMARY RECOMMENDATIONS BY APPLICATION
THE ABSOLUTE BEST: For critical, can’t-fail applications like RV roofs, healthcare facilities, or permanent commercial repairs, EternaBond RoofSeal is the only answer. Its MicroSealant technology and proven track record justify the premium price. When failure means water damage over sensitive equipment, valuable inventory, or critical operations, don’t compromise.
THE EMERGENCY ESSENTIAL: To stop an active leak right now, even in the rain, every toolbox needs a roll of Gorilla Waterproof Patch & Seal Tape. Keep it in your emergency kit, your truck, and your home. It won’t be permanent, but it will prevent thousands in water damage while you schedule proper repairs.
THE METROLOGY SPECIALIST: For metal roofs, gutters, flashing, and any application where thermal expansion matching matters, Ziollo aluminum-backed tape or similar foil-backed tapes are superior. The metal backing expands/contracts with metal roofs and provides exceptional UV protection.
THE HIDDEN PROFESSIONAL: For sealing under flashing, vents, skylights, or anywhere you need a hidden gasket, Bee-Butyl 3000 double-sided tape is the professional’s choice. It’s how we prevent leaks before they start on new installations.
THE VALUE LEADER: For a wide range of effective, durable repairs without the premium price, XFasten Butyl Tape offers incredible performance for the money. For rental properties, non-critical repairs, or budget-conscious homeowners, it’s an excellent choice.
The 80/20 Rule of Roof Repairs
In my experience, 80% of roof repair success comes from just a few factors:
- Surface Preparation (30%): Clean, dry, sound substrate
- Product Selection (25%): Right tape for the material and conditions
- Application Technique (25%): Proper pressure, overlap, edge treatment
- Environmental Conditions (10%): Temperature, humidity, timing
- Product Quality (10%): Actually the smallest factor if others are right
Notice that the actual tape quality is last on the list. A medium-quality tape perfectly applied will outperform a premium tape poorly applied every time. But for maximum longevity, you want both: premium tape with perfect application.
When to Call a Professional
After all this information, you might feel equipped to tackle any repair. But know your limits. Call a professional when:
- The repair is over valuable interior spaces (great room, bedroom, electronics)
- You’re unsure about the roofing material or its condition
- The area is large or complex (multiple seams, intersections)
- Safety is a concern (steep pitch, height, electrical hazards)
- Warranty preservation is important
- You’ve tried and failed before
- The cost of being wrong is high (commercial operation, rental income property)
A professional roofer brings: 1) Experience with thousands of similar repairs, 2) Proper safety equipment, 3) Knowledge of local building codes, 4) Relationships with manufacturers for technical support, 5) Insurance if something goes wrong, 6) Often warranties on their work.
The Future of Roofing Tapes
Technology continues to advance. Emerging trends I’m watching:
- Self-healing adhesives: Microcapsules that repair small cracks
- Phase-change materials: Tapes that store/release heat to reduce thermal stress
- Smart tapes: With embedded sensors to detect moisture intrusion
- Bio-based adhesives: Sustainable alternatives to petrochemical products
- Installation robotics: For consistent pressure application on large projects
But for now, the products reviewed here represent the current state of the art. They work, they’re proven, and when applied correctly, they provide decades of waterproof protection.
MY PERSONAL TOOLBOX
After 20 years, here’s what’s always in my truck:
- EternaBond RoofSeal: 4″ and 6″ widths for permanent repairs
- Gorilla Waterproof Tape: For emergencies and wet surface repairs
- Bee-Butyl 3000: For flashing and hidden seals
- Steel seam roller: Two of them, one as backup
- EPDM/TPO cleaner and primer: Small quantities for any job
- Infrared thermometer: To check surface temperatures
- Notebook: To document repairs with photos and notes
This kit handles 95% of the repairs I encounter. The other 5% might require specialty products, but these are the workhorses.
Parting Wisdom
Roofing is equal parts science and craft. The science gives us amazing materials like modern roofing tapes. The craft is in knowing how to use them properly. Remember these key principles:
- Water always wins. Given enough time and the smallest opening, it will get in. Your job is to not give it that opening.
- Preparation is everything. The time you spend cleaning and prepping is never wasted.
- Wider is better. When in doubt, use a wider tape. The extra material cost is insignificant compared to a callback.
- Document everything. Photos before, during, after. Notes on conditions, products, techniques. This helps with warranties, future repairs, and learning.
- Respect the roof. It’s protecting everything underneath. Do the repair right, even if no one will ever see it.
Whether you’re a homeowner tackling your first repair or a fellow professional looking to refine your techniques, I hope this guide has been valuable. The knowledge here comes from real-world experience—both successes that lasted decades and failures that taught hard lessons.
Remember the pro’s mantra: the success of the repair is all in the preparation. Take the time to clean the surface, apply the tape carefully, and roll it down firmly. Do it right once, and you won’t have to do it again.
Stay dry, and may all your repairs be permanent ones.
Affiliate Disclosure: This post contains affiliate links. If you make a purchase through these links, we may earn a small commission at no additional cost to you. This helps us continue to produce in-depth, experience-driven reviews based on real-world professional use. We only recommend products we trust to protect property from water damage.
Professional Disclaimer: This guide represents professional opinions based on 20 years of roofing experience. Local building codes, manufacturer instructions, and specific site conditions may require different approaches. When in doubt, consult with a licensed roofing professional in your area. Roof work can be dangerous—always prioritize safety.
About the Author: With over 20 years in the roofing industry, I’ve installed and repaired every major roofing system type across residential, commercial, and industrial applications. My experience includes everything from historic slate restoration to million-square-foot TPO installations. I currently run a roofing consulting business and train new roofers in proper techniques.